
最近リリースされた「mabl CLI」はmablを簡単操作できるコマンドラインツールです。Node.jpのパッケージとして配布されているため導入も簡単です。
mabl CLI
ユースケースを見れば、どんなことができるかイメージしやすいと思います。
- コマンドライン経由でテストを作ったり実行したりできる
- CI/CDにmablを統合できる
- アプリのデプロイごとにかんたんにスモークテスト・リグレッションテストを実行できる
- Selenium(WebDriver)で作成されたテストをmablにインポートできる
- ワークスペース、アプリケーション、環境やテストを検索できる
- テストブランチを使って作業できる
- テスト結果を確認できる
- スクリーンショットをダウンロードできる
- mabl内のテストをSelenium IDEフォーマットでエクスポートできる
特にインポート・エクスポートができるのはすばらしいですね。あとはスクリーンショットを初めてmabl上のデータを探したり取得できるので、現場ごとにことなるであろうテスト結果のレポーティングも簡単にできそうです。
インストール
Node.js環境をまず準備します。バージョンは10.0.0以上推奨。Mac環境であればHomebrew経由でのインストールが推奨になっています。あとはターミナルから以下のコマンドをたたくだけ。
$ npm i -g @mablhq/mabl-cliインストールが完了したらターミナルを再起動して以下のコマンドを叩いてみましょう。バージョンが正常に表示されればインストール成功です。
$ mabl --version
> 0.5.7-beta
ログイン
以下のコマンドを叩くとブラウザが起動しmablのログイン画面が表示されます。
$ mabl auth loginログインするとAuthorization Keyが表示されるためコピーしておき、ターミナルにもどってKeyを入力すればログイン完了です。
$ mabl auth login
Please log in using the opened browser window to obtain an authorization code
? Authorization code: [hidden]
Login successful for: daipresents設定画面からAPI keyを発行して、以下のコマンドでログインも可能です。
$ mabl auth activate-key <YOUR-API-KEY>ログイン状態は以下のコマンドで確認します。
$ mabl auth info
Logged in as user user [daipresents]
Login expires in [3 hours, 56 minutes]
mablコマンドのヘルプを見てみます。
$ mabl --help
mabl <command>

Commands:
  mabl applications <command>  Manage your applications
  mabl auth <command>          Manage auth for the mabl CLI
  mabl branches <command>      Manage mabl branches
  mabl config <command>        Configure defaults for the mabl CLI
  mabl credentials <command>   Manage your testing credentials
  mabl deployments <command>   Manage mabl deployments
  mabl environments <command>  Manage your environments
  mabl tests <command>         Manage tests
  mabl test-runs <command>     Manage existing test runs
  mabl workspaces <command>    Manage your workspaces

Options:
  --version, -v  Show version number  [boolean]
  --help, -h     Show help  [boolean]
テストをローカルで動かしてみる
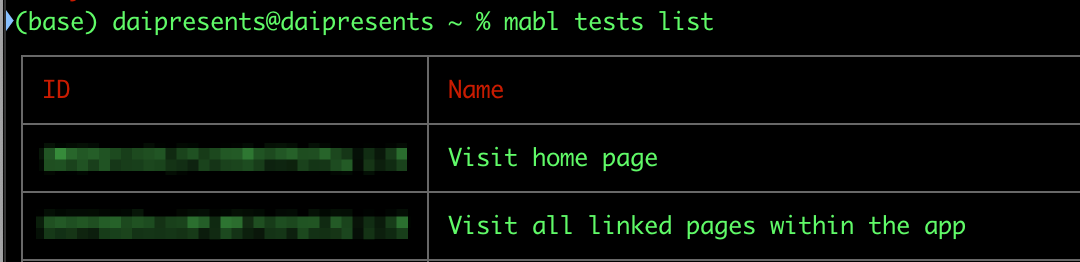
まずテスト一覧を表示します。IDが表示されるのでそのIDをベースに実行してみます。ちなみにデフォルトで作成される「Visit home page」や「Visit all linked pages within the app」はCLIからまだ実行できないようです。
ためしに、僕のブログにアクセスし、WordPressのAPIを叩く簡単なテストを実行してみます。APIで取得したデータを検索ボックスに入れて検索しています。
$ mabl tests run --id <TEST_ID>
Running test(s) on the master branch
Running test:  API request and response validation / APIのテスト
URL:  https://atomic-temporary-22783153.wpcomstaging.com/
Workspace:  <WORKSPACE_ID>
Test description:  APIを叩いてそのレスポンスをチェックしています。これによってテストデータをAPI経由で準備したり、データの状態を変更してテストを進められるためテストが簡潔になります。
参考: https://atomic-temporary-22783153.wpcomstaging.com/2020/mabl-api-requests-response-validation/
Updating the local mabl Trainer...
Update complete!
Using Chrome at the following path: /Applications/Google Chrome.app/Contents/MacOS/Google Chrome
1:53:51 PM -  Training tab identified
1:53:54 PM -  Training context is ready
1:53:54 PM -  Starting full run immediately
1:53:54 PM -  Test replay starting
1:53:54 PM -  Set viewport size to width 1463
1:53:55 PM -  Visit URL assigned to variable "app.url"
1:53:56 PM -  Send GET request to "https://atomic-temporary-22783153.wpcomstaging.com/wp-json/wp/v2..."; assert response status equals "200"; and store "[0].title.rendered" of response body as json in variable "post_title"
1:53:57 PM -  Insert value of variable "post_title" into the "サイト内を検索" text field
1:53:59 PM -  Send "[ENTER]" keypress to the "サイト内を検索" text field
1:54:01 PM -  Assert "innerText" of the <h1> element with text "\"アジャイルポリス・スクラムポリスに気をつけて\"" contains the value of the variable "post_title"
1:54:03 PM -  Assert "innerText" of the <h2> element with text "アジャイルポリス・スクラムポリスに気をつけて" equals the value of the variable "post_title"
1:54:06 PM -  Test run complete
通常、mablの画面から実行すると、ブラウザ環境をクラウド環境(GCPのUSリージョン)で立ち上げたり、裏側でDOMを取得したり、スクリーンショットを撮ったり、ネットワークをモニタリングしたりするため1分15秒程かかってしまいます。
しかし、CLIの場合はそういった処理が動かないため、わずか15秒ほどで実行完了しました。しかもRunとしてカウントされないため、トライアンドエラーでテストを作成するときはこちらがよさそう。
もちろん、クラウド環境を指定して実行もできますし、デプロイに反応して実行なんてのも簡単にできます。
さらに、以下のようにラベルを活用した実行もできます。Rspecみたいな使い方ができるので特定のケースに絞って実行できます。
$ mabl tests run-cloud --labels feature-x feature-y --exclude-labels wipテスト結果をエクスポートする
ID指定してテスト結果をエクスポート・ダウンロードできます。
$ mabl test-runs export <TEST_RESUT_ID>
Export test run [<TEST_RESUT_ID>]
  ✔ Creating export request [XXXXXXXXXXX]
  ✔ Processing export [XXXXXXXXXXX] status: [completed]
  ✔ Downloading export artifact to [XXXXXXXXXXX.zip]
zipファイルの中身はスクリーンショットとテスト実行時間やIDが書かれたマニフェストファイル(yaml)でした。
ちょっと長くなったのでケースのエクスポートは次の記事にまとめます。お楽しみに。
